Our Observatory Design & Installation Process
1. Questions
The first step in our process of observatory design & installation isn’t the sales pitch (actually we don’t even have a sales pitch). In fact, the most important thing we do is ask questions to find out what kind of observatory you would like, how and where you will use it, and a little about you and your equipment.
Because each of our observatories is custom-designed, there’s no “off the shelf” or template designs and we don’t just customise designs we’ve done before. Each person, and their equipment and needs is different and no two observatories that we’ve installed have been identical.
So we will ask you a lot of questions – we’ll need to know what gear you are using right now and what you want to be able to use in the future. We’ll also need to know how tall you are and a little about your preferred observing style. Finally, we’ll need to know about the intended location: what will surround the observatory, whether it’s on level ground and so forth.
2. Costing
Once we understand what you want and need, we’re able to provide you with a cost of course.
Our price is derived by first adding up the cost of all the various timber and other materials required for the observatory. We’re able to make empirical calculations to derive the length and thickness of all the joists and sheet materials, plus of course the rolling gear and all the other installed accessories. To this we add our labour cost for building the observatory and a small contingency that covers any unexpected costs or price increases.
Because that price is based on our actual costs and the time it takes to build, and never inflated for the sake of profit, it’s not something we negotiate on. We’ll give you our very best price at the outset so you can make a simple decision knowing that there won’t be any nasty surprises.
We can give you a choice is on the groundworks. Whilst we are happy to quote for this where practical (that is, within South East England), it’s almost always less expensive for you to do them yourself. If laying slabs and/or concrete isn’t your thing, we’re always happy to liaise with a local builder and provide good quality plans so that it’s all done just right.
3. Observatory Design
Our third step is to design your observatory. As I mentioned before, this design is likely to be totally unique to you – with the hundreds of different telescopes, mounts and owners out there, no two are ever the same! As a result, we usually require a small design deposit to cover the cost of producing the plans should the project not go ahead for any reason.
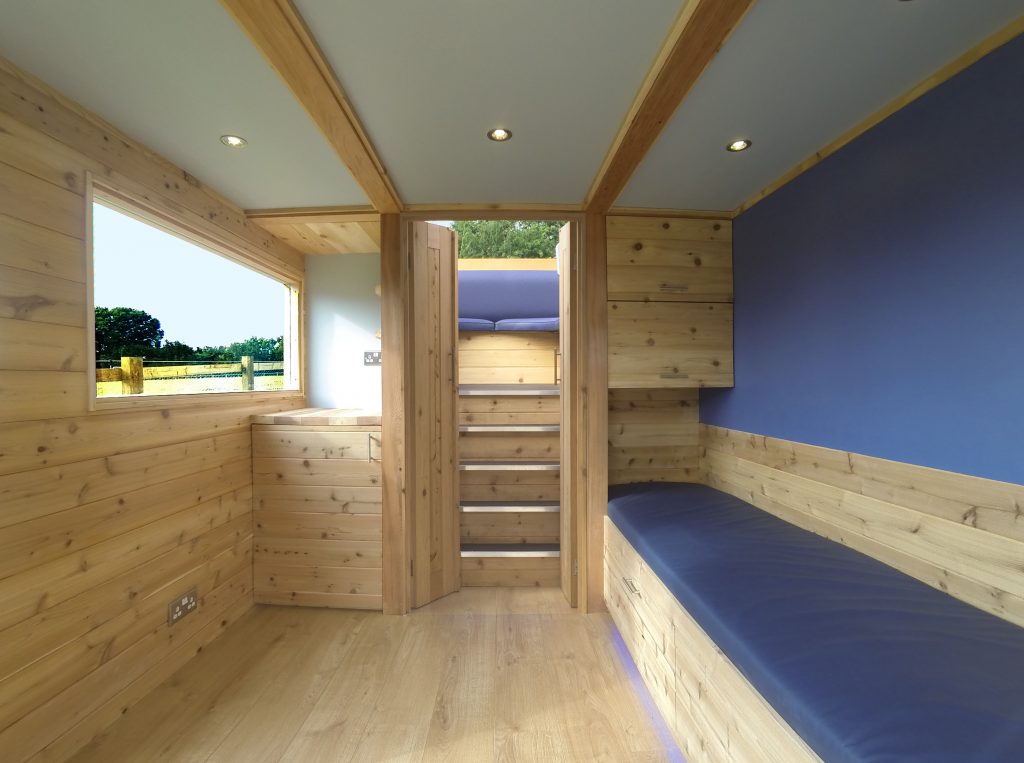
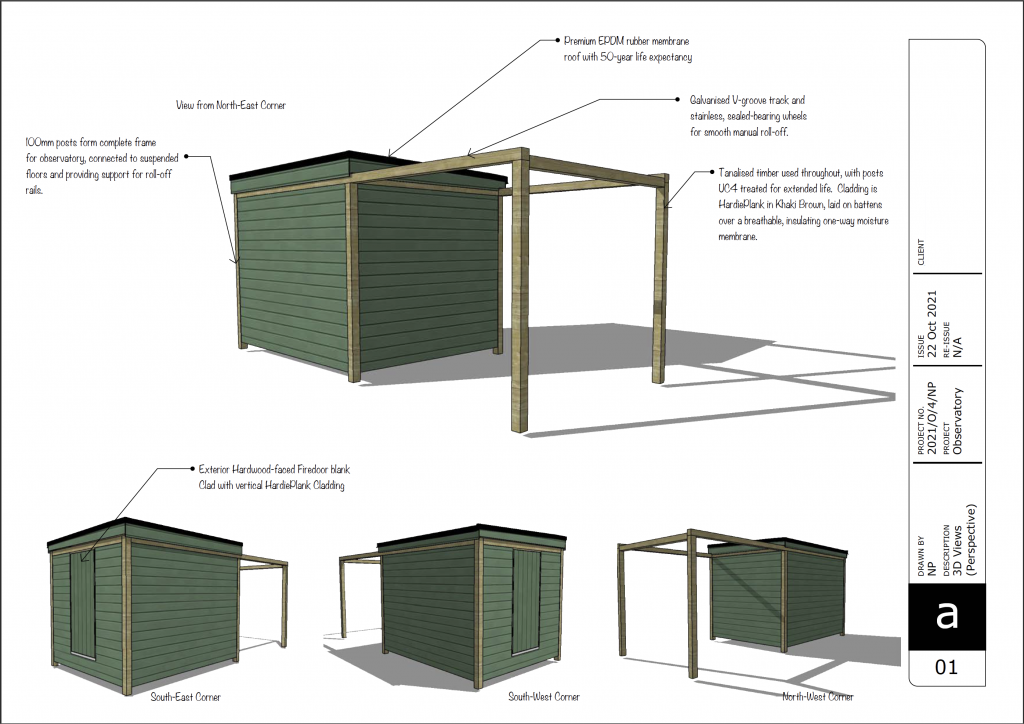
We use computer-aided design to produce a set of plans for the observatory which include floorplans, elevations (“flat” images of each side of the observatory) and sections (cut-through views), as well as some nice 3-dimensional views of the observatory as a whole.
Once the design is complete, we send you the plans along with a full specification of all the materials we will use, and of course a formal quote that takes into account any design changes we have agreed with you along the way. If the design is unchanged from the original agreed specification, the quote should be unchanged too of course!
4. Manufacture
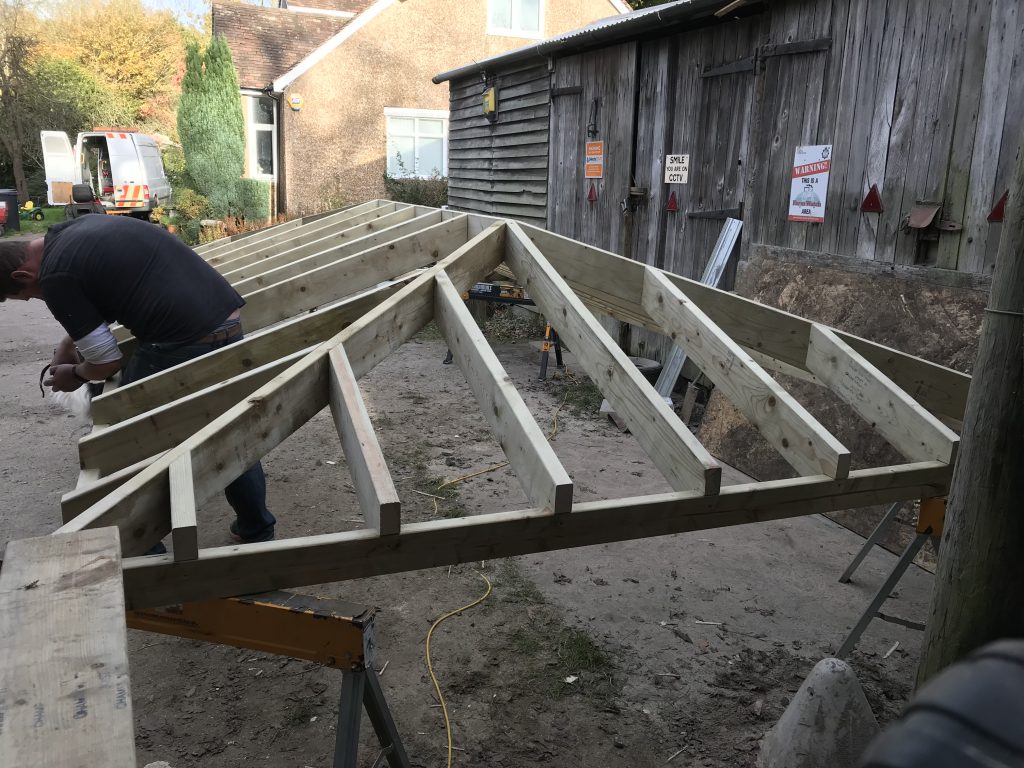
Most of the fabrication of your observatory takes place in our own workshop, located on a friendly little farm near Dorking, Surrey. We have a big space that makes it easy to put together all the panels for even the largest observatory, though some things are still best done outdoors as you can see!
We assemble the doors, floor and walls – and for smaller observatories, the roof too. For larger observatories, we will make the roof trusses and pre-cut all the roof boards and floor panels too.
Once the walls are constructed, we’ll generally install any power sockets and cabling ready for installation. The whole process takes up to three weeks.
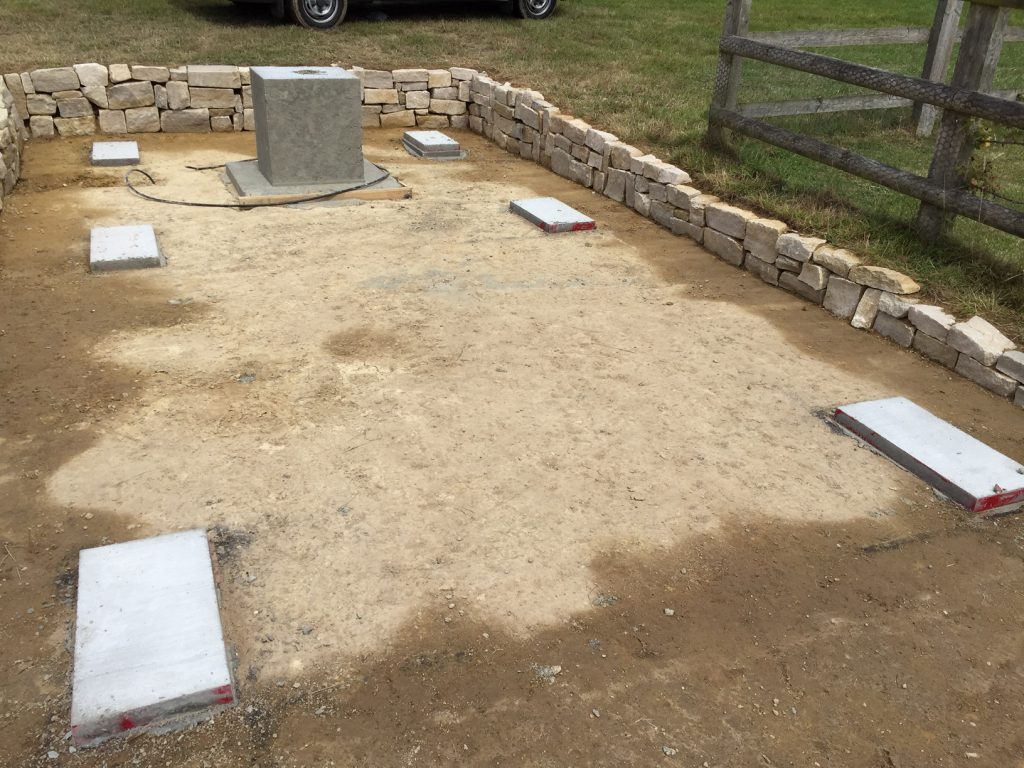
5. Ground Works
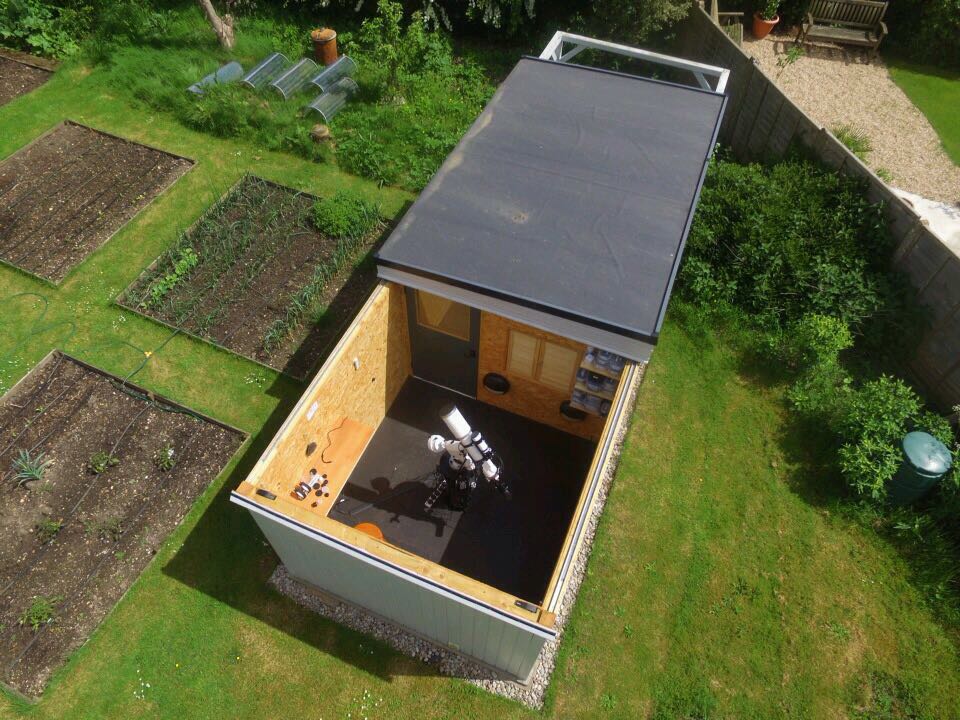
As we said above, it’s often easiest and cheapest for you to arrange the ground works yourself, however if you are local to us, we are happy to arrange this for you. The first step in either case is us providing a groundworks plan so that you can see where everything needs to go. Generally speaking, our ground works involve pouring a few small concrete pads for the corner posts of the observatory, and a larger base for your telescope pier. The work normally only takes a day or two, after which it’s best to let the concrete pads have a couple of weeks to harden fully before mounting the observatory and pier on them.
Sometimes you will need to run electricity to the observatory location, if there isn’t power nearby, and if it can’t be run along a wall, it will need to be buried. We are always happy to liaise with your ground works team and/or electrician to ensure a cable of the correct specification is laid for the observatory’s requirements. If we are doing your ground works, we are happy to lay an armoured cable in a trench for you.
6. Installation
This is the most exciting part for many of our customers – and is actually often the quickest part of the process. Generally, we will attend site for two or three days and you’ll see your observatory take shape very quickly. However, you’ll also notice that we take certain steps before we start to ensure a smooth installation and to protect the area around the observatory from the rigours of the build:
- We’ll protect your lawn, flowerbeds and any other sensitive areas with boards or sheeting to prevent damage.
- We’ll erect a mini-marquee to cover our tools and equipment, especially if the weather may be inclement.
- We’ll comprehensively check and measure the groundworks for dimensions and levels.
Once that’s done, we’ll unload the panels we’ve constructed and begin the build.
Our aim is always to get the building fully constructed and weather-tight on the first day, so we don’t have to worry about overnight rain. On the second day, we’ll return to complete all the cladding, electrics and interior finishing. Some of our simpler observatories can be installed in a single day, and some can take up to a full week, depending on their size and complexity.
As part of the installation, we perform full testing and verification of the electrical circuits within the observatory, and our Part-P registered electrician will provide a full Electrical Installation Certificate for the installation. Likewise, we will notify the work to your local Building Control Body as required by the regulations, and you will receive a certificate from our registration body, the NICEIC.
We’ll always let you know how many days we expect to be on site when we book your installation. It’s rare that we need to move or extend an installation, but if the weather is especially poor we will sometimes do so because we are able to achieve a better finish in the absence of heavy rain or snow!
7. Commissioning & Service
Once your observatory design & installation is complete, you may wish to commission your own observatory (many of our customers do) but we are here to help as much or as little as required. Whether it’s just the installation of the pier (which we usually carry out) or assembling and aligning your telescope too, we’ll do so with precision and care. Occasionally, we may make a separate visit to commission your observatory, especially if the pier or equipment arrives after it is completed of course.
With a building of this type, and when undertaking such a complex activity, it’s always possible you might need us to make an adjustment or two once the observatory is built. You’ll be pleased to hear that this is where we truly are a world away from our competition. Service visits, to address any issues with the built observatory, are free for the first five years – and cover faults in materials or workmanship for that whole period. You can expect us to be prompt in dealing with any issues too – we aim to see you within a week wherever possible – and we will always prioritise any urgent issues, no matter how minor they might seem.
For any other (non-warranty) adjustments or additions, don’t hesitate to ask. We’ve built steps, added rooms, motorised roofs, installed alarms, CCTV and even a fridge! All manner of other requests can be accommodated.